Originally the body of the handle was supposed to be from a nice piece of Cocobolo, but it was decided that optically it would be 'too much' for the damascus blade. In retrospect - I agree.
The following photo shows the materials that were in question. First the Cocobolo was the main candidate, but than a more 'classy' material was picked :)
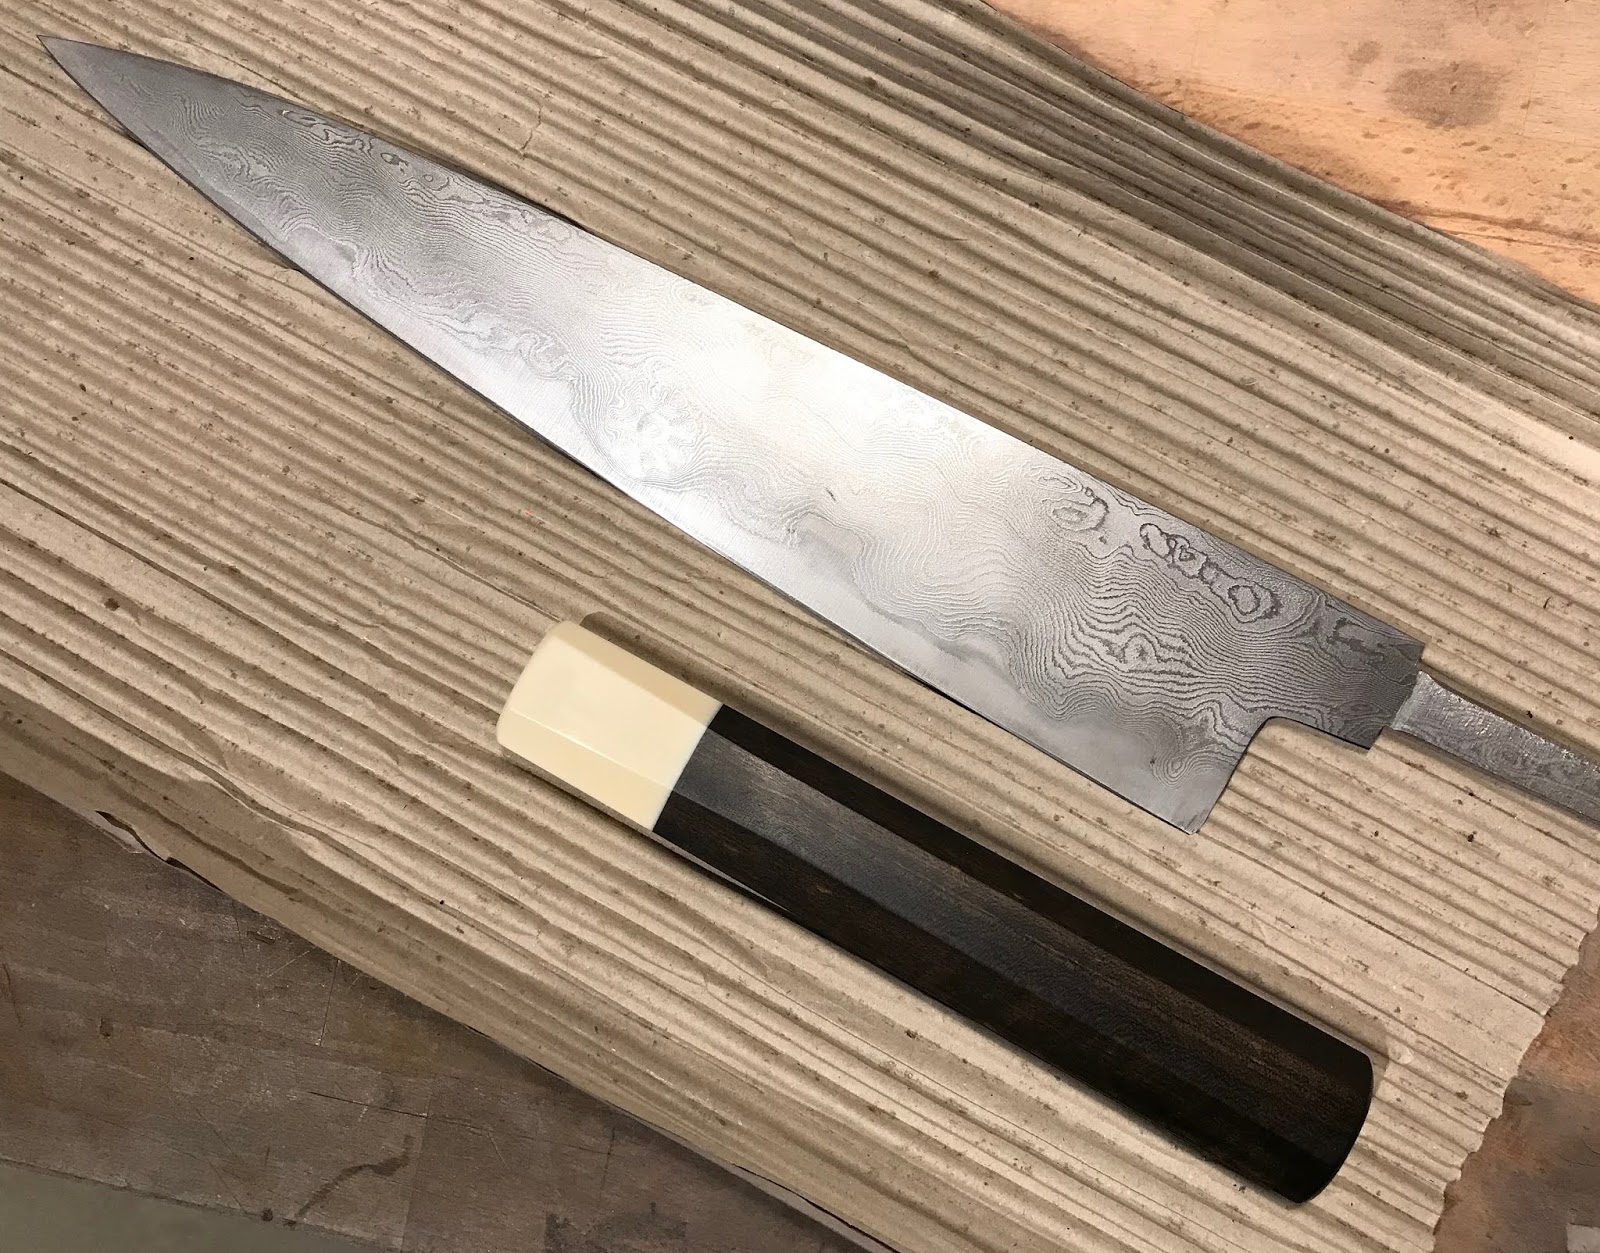
Preparing all parts
I would start with cutting the handle wood to length and squaring it up. The squaring up takes a little time, but allows for more precise drilling and gluing later.
 |
| Squaring up! |
 |
| Squared up! I love the gentle figure. |
 |
| This is the basic idea. |
This handle was going to be made with a hidden tang so that the dowel would not 'disturb' the walrus ivory. For the ferrule this meant first drilling with a 3 mm drill and the follow up with a 12 mm, but leaving some 5 mm of material in front.
 |
| Drilling the handle block |
 |
| Drilling the ivory. The smell was NOT nice. |
 |
| Components of the handle |
To saw the block closer to shape I have used painter's tape as an eye guide, as a line drawn with a pencil was basically invisible on the dark wood.
 |
| Using painter's tape as a guide. |
Once the block was cut I would hand sand it on 80 grit paper to smooth the surfaces.
To create a slot for the blade in the ferrule I would drill two more 3 mm holes ...
... and connect them with a file. First a coarse round file to remove the material and then a flat file to bring the slot to its final size.
 |
| ... getting there ... |
 |
| Not perfect, but good enough. I need to get better at this though. |
 |
| Dry fit of all the parts. No gluing yet. |
Gluing. This part I do normally in two steps with hidden dowels. First I glue the dowel inside the handle block (using just a 5 minute epoxy) and once that is cured I glue the ferule on the top. I file shallow marks along the dowel to create small 'pockets' where some of the excess glue can go instead of just leaking inside the dowel slit (what may later require some more filing).
 |
| Just about to glue the dowel inside the handle block. |
Handle shaping
Once the whole handle has been glued together and tested that the tang still fits inside, the handle shaping may start.
First I would grind the excess material on the ferrule off, so that I can all 4 sides of the handle flat. This was the most SMELLY part of the process. Yes - I did have a vacuum cleaner attached to the grinder, but the smell would of course make it through all the filters. This work would have not been possible without respirator (which did not allow to get the smell in). The vacuum cleaner produced that smell for weeks to come - and even after I changed the paper bag.
The next step was to grind the (still rectangular in cross section) handle to close to final width and height. I would check with the blade regularly as to make sure, that I keep the handle on axis.
Before I would go ahead with the 'octagonizing' (yeah, I just made that up), I would clean up and sand the handle up to 600 grit. The reason is that it is easier to consistently sand larger surface without introducing unwanted change in shape.
Now comes the putting the final shape on the handle. Here I still used a small (125 mm) disc sander on the side of my small belt sander. This works pretty well, one just needs to careful, as otherwise the handle will fly towards your face (had that happen a couple of times, so I wear a face shield). I keep the handle on the ends with tips of my fingers and gently move it left and right to achieve homogeneous material removal. And I check very often.
Once the handle had its octagonal shape it was sanded up to 600 grit, but one more final shaping step was still missing.
 |
| checking how the handle and the machi of the blade match. |
 |
The areas painted with a pencil show by how much is the handle taller
than the tang of the blade --> too much for a gentle taper. |
Recently I have started adding additional taper from sides. This allows the handle to be thinner in the front what is comfortable for a pinch grip, while it maintains enough thickness further away from the blade.
Tip: finish the handle up to at least 600 grip before doing this additional 'ferrule taper' as it gets a little harder once the taper was ground, to keep the handle steady while moving up the grits.
I have taped the parts of the handle that were not supposed to be scratched during this step.
 |
| About to grind (sand) the ferrule taper. |
Once I got the ferrule taper where I wanted to have it, I would gently sand the tapered parts up to 600 and than blended the taper with the rest of the handle with 600 and 1000 grits.
 |
| The freshly ground 'ferrule taper' |
All that was left at this moment was to round the edges. On the ferrule I have use a 400 (?) belt and rotated the handle around its axis while touching the belt gently under an angle. I have not tried this before, but it worked very well.
The finishing of the handle was (upon request of the blade owner) made with just a few coats of board butter. With these particular materials I actually think that not much more is necessary, but the handle should get a bit of the board butter regularly.
When the time has come to finally glue the handle on the blade I realized, that in spite of my honest effort I managed to get some very gently surface patina on the blade. Since I was not going to refinish the blade I only cleaned it with a BKF - and that worked like a charm.
 |
| Just about to mount the handle on the blade. |
Gluing. As usually - in the first step I would glue the handle inside with a G/flex epoxy and would use a hot air gun to heat up the epoxy to make it easier to get it inside the tang opening. I would use small pieces of paper towel dipped in toluene to clean up the top of the handle and the blade.
Once cured I would use 5 minuted UHU epoxy (colorless transparent) to fill-in the fine voids around the tang, let it start curing and only then wipe the excess off (again toluene and paper towels).
 |
| Tiny voids around the tang being filled with 5 minute epoxy. |
Lessons learned:
- Make damn sure that you keep the carbon steel blades clean and free of fingerprints and these will show later as patina or even surface rust (depending on the storage conditions)
- Chacate Preto is a lowly wood to work with. I will buy more once I will manage to locate some (I bought one large piece from Dictum, but they do not offer it anymore). It was very cheap too :)
- Grinding teeth smell awfully - it does not matter from which animal they come. Just grind/sand slowly and do not heat it up - that will help to mitigate the worst of it.
- Ferrule taper makes even a large WA handles (this knife needed a large handle because of the blade size and weight) feel much more nimble in hand.
Finished knife
 |
| yes, the knife is a beast. |
 |
Left to right:
285 Bolf, 270 Ikeda honyaki suji, 240 Mizun Tenrenjo |


Nice :-)
ReplyDeleteVery good read, its really good to see that this is all done on a 1x30.
ReplyDeleteAre you adjust the table to 45 degrees on the disk sander when chamfering or are you just going free hand?
Thank you Liam. Yes - I was doing it hand free on the disc sander - holding the handle on both ends and moving it left-right as the disc sander is simply too small. In retrospect - it would have made a lot more sense to make a extra long 'platen' for the grinder (as the straight section of the belt is long enough' and shape the handle while holding it vertically on the belt). That is how I do it today on a 2x72"
Delete