Thursday, December 22, 2016

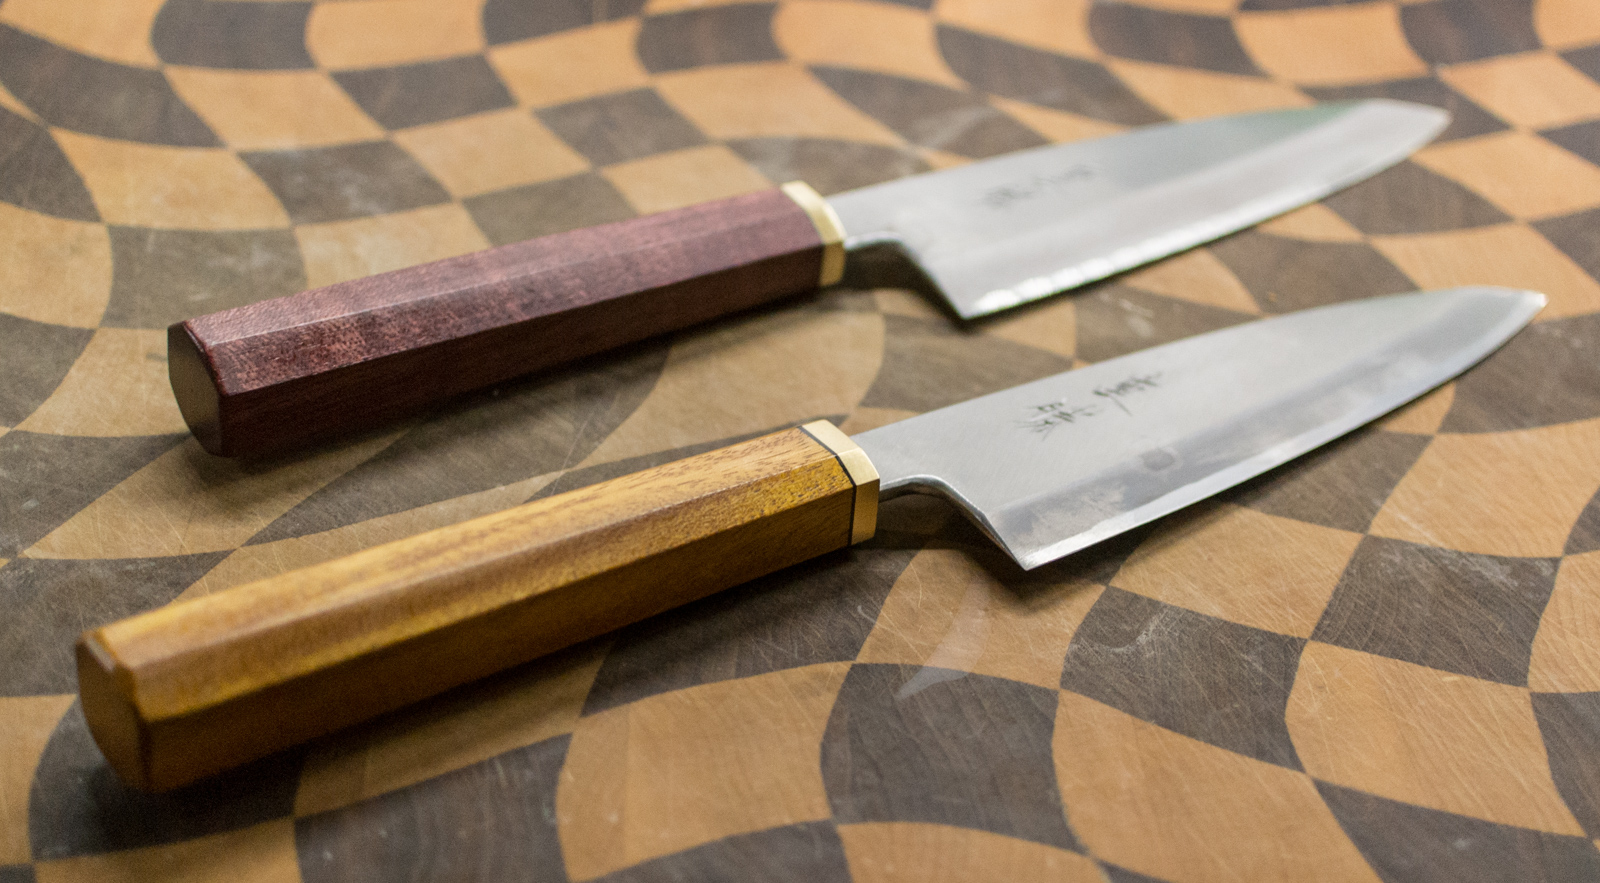
Project #15 - Handle for a Kato 80 mm petty

This project together with the #16 is the first commission work which was agreed under special terms, as I am still learning basic skills and trying new things.

The wish for this particular knife was a nimble, thin handle, than would allow to use the knife as a parer.

I was also rather nervous, because it involved removing a previous custom made handle and it was a strange feeling to undo someone else's work. But hey, whatever makes the customer happy :)

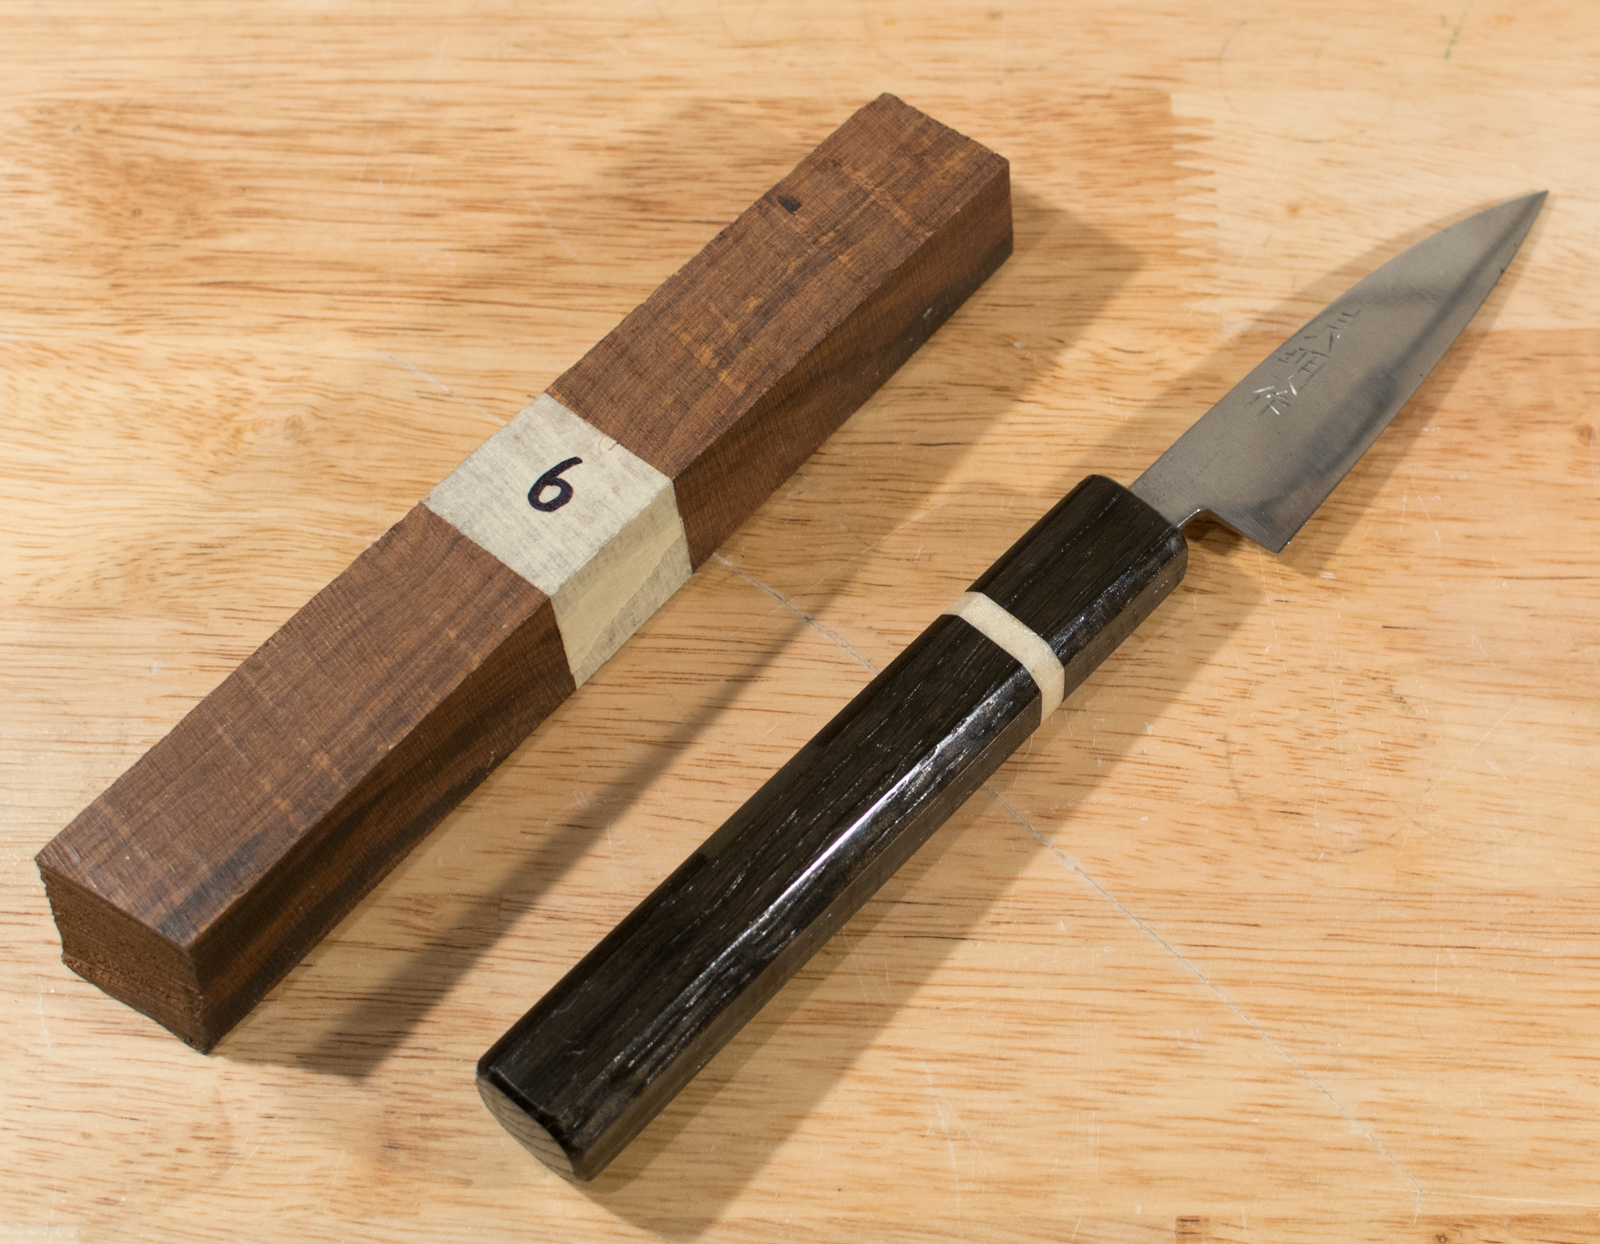
The knife with the original handle and the ironwood block.

Design

The final choice of design and materials was relatively simple - a 3mm thick brass ferrule with ironwood handle. This also implied a challenge - since the bolster was going to be press-fit onto the tang, the handle would be shaped already glued onto the tang. This meant that if anything should go south, I would have to grind the complete handle off the tang and start from the scratch. I am rather happy to say that that did not happen.

Handle removal

As already mentioned - I had to start with removing the original handle which was made from some black wood, spacer and epoxied onto the tang. This was done rather quickly with a coarse belt, but I had to be careful not to scratch the uncovered part of the tang, as otherwise it would have been necessary to re-finish the whole blade - a job I was trying to avoid.

To grind off the old handle took just a few minutes.


Once the handle was removed I have ground very tiny 'shoulders' onto the tang so I would be able to get a nice fit with the bolster. I used #120 belt as I was trying to remove as little material as possible. The job was finished with files.

Grinding 'shoulders' onto the tang.

Bolsters (yes, 2 of them)

Having the experience with the 2 funayuki knives I have rehandled before working on this one taught me that getting a bolster fit on a Japanese kitchen knife is not easy, because the tangs are not ground to shape and thus their cross section where the bolster should sit is irregular.

I have decided on 3 mm brass as 5 mm seemed too much for a handle that was requested to be rather thin & narrow. 

Blade, ironwood and brass - keeping it simple :)

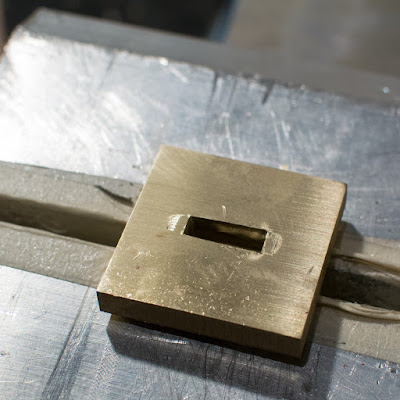
The process was as usual  - cutting out a piece of brass, scribing the centre lines and the shape of the tang, drilling 3 holes with 2 mm drill bit and filing with needle files to shape, keep testing how the bolster fits the tang and hammer-in the last few mm. But I failed. Even though I tried to flatten the tang from sides before I started,  I did not manage to avoid gaps on the sides of the bolster.

Yep, that is a gap. Let's try it again.

I came up with only one way how to assure that I will get the bolster fit without any gaps - and that was to grind shoulders on the sides of the tang as well. It was a bit tricky, because the tang was not too thick so I could only afford to remove very little material, before putting the strength of the whole blade in danger.

So I went back to file guide, sanded a fraction of millimetre of steel from each side and again finished with files. The tiny shoulders on left and right side gave me just enough safety margin so that after the new bolster was fit onto the tag I would get a much better fit.

Once the new bolster was fitting nicely, I would remove it and finish the front surface on a marble stone with sandpaper up to grit #2000.

Bolster with #2000 grit finish.
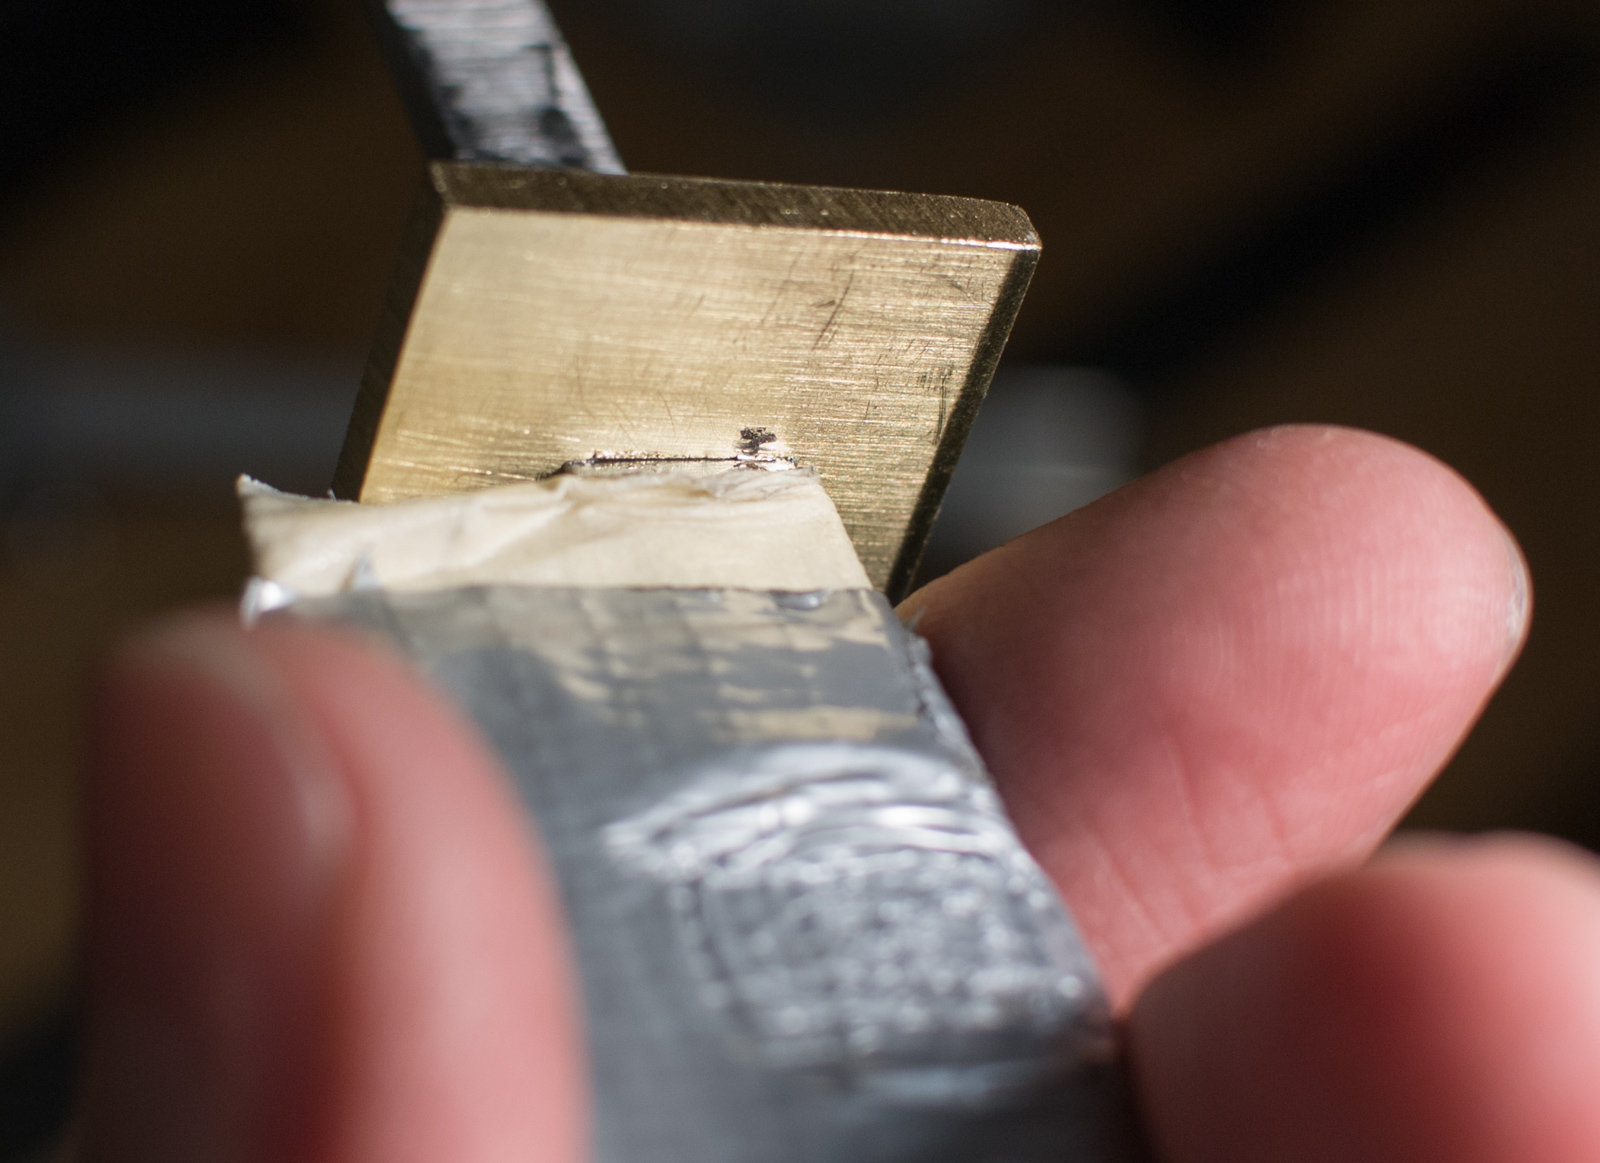
The front surface was covered with tape and I used the belt grinder to get it closer to its final size. I was trying to minimize the amount of grinding once the handle will be glued as the brass gets blistering hot very fast and I did not want to overheat the epoxy joint.

Mounting the handle

Before the wooden block could have been glued onto the tang 2 steps had to be accomplished - drilling and filing the tang slot and sanding the block until it would fit without gaps on the tang.

The drilling was done with a 4 mm drill bit. This was a bit larger than actually necessary, but on one hand this was not going to be visible, but more importantly I needed to be able to fit a needle rasp in the drilled hole to be able to make the tang slot.

Squaring-up the block by hand with #120 sanding paper on the stone block.

Handle block ready for gluing.

Once all parts were ready I could proceed with the gluing. I have first covered most of the handle with a tape and fixed it carefully in a vice. As usually I have used G/flex epoxy as it has relatively low viscosity (so it will albeit slowly flow inside the narrow tang opening) and long pot time so I did not have to hurry.

Important: During the gluing it is important to allow the air which is trapped inside the tang opening to escape. This can be done by slowly moving the tang in and out and going deeper just step by step. If too much air will remain trapped inside the handle it could push the blade up as the glue cures and you will be left with a gap between the wood and and bolster. This can in particular be an issue with a handle this small & light.

I have then came up with an idea to use 2 clamps to make sure that there will be no gaps - a usable idea in general, but one needs to be careful - if the force (of the clamps) on the two sides is not equal, it may actually induce a gap.

Gluing it all together - watch out for gaps!

Handle shaping

Once the glue cured the next step was to shape the handle. At this stage one should really not hurry. The handle is fixed with an epoxy to the knife - any larger mistake will mean that the whole handle - including bolster - will have to be removed and once can start all over.

Cleaning up the handle after gluing.

Tip: I was told that if one needs to removed a glued handle from a knife, the knife could be boiled (! yes - that is not a typo) and once the handle heats-through the epoxy should soften. It sounds terrible, but 100 degrees Celsius is not enough to negatively influence the blade hardness (since tempering temperatures during heat treat are around 200 degrees Celsius, give or take) and a short boil should not cause rust. But I have not tried this method yet, so use at your own risk :)

Before I would start with rough shaping of the handle I would first check whether the wood (which at this stage is nicely squared up and thus has a rectangular cross section) is in line with the blade, or whether there is some slight relative rotation. If there were any I would adjust the work rest on the grinder and first fix this.

Alignment-grinding. What you can not see is that the work rest is under
angle slightly larger than 90 degrees to the grinder surface.
Once I was sure that the handle is aligned with the blade I would draw centre lines on top and bottom of the handle as well as on the back side. Then I would draw lines that would reflect the taper if the handle width and use the belt grinder with #60 (#40 would be fine too) belt to do the rough material removal and follow with #80 grit disc grinder to clean up and flatten the sides.

About to grind the taper to the sides of the handle.

I would follow in a similar manner to grind the taper to the top and bottom side of the handle. I would of course have to be careful to tough the running blade with the choil of the knife.

Vertical and horizontal taper ground to the handle.

Once the vertical and horizontal taper was ground it was time to check in hand whether the size of the handle is about where it should be. Since the handle at this stage is just a rectangular block it is not easy to judge how it will feel once ground to octagonal shape. Sill - it should be tested in hand. Over time one develops the 'feel'. 

If everything is right than the next step is grinding the octagonal shape. This is for me a tricky part as while one is grinding on the disc grinder - it is not easy to judge the angle precisely so I would keep checking constantly. I would also not try to grind one corner completely before moving onto the next one as I wanted to keep some material as an error margin should one corner be ground under angle that would deviate from the mirrored one (left-right symmetry).

At this stage I would say that I do not aim for a top-bottom symmetry. I tend to grind the bottom corners a little more and under different angle.

Final shaping finished. Next - finishing the surface.

Final shaping finished.

Finishing

Now comes my favourite part. During the finishing the wood starts to reveal its beauty - and this is in particular the case for Ironwood.

Before I moved on with the handle I took a small piece of iron wood (and off-cut) and did a quick test on how it will respond to finishing. I gave it a quick polish with 240, 400 and 600 sandpaper and then applied a coat of True-oil. As it turned out this would have not been a good choice since ironwood is an oily wood by itself and thus the Tru-oil did not want to harden properly. I also found out that the wood reacted interestingly to steel wool. If rubbed with it for too long the grain structure would stand out as the filaments in the wood had different hardness. Still - this was an interesting test to do and, together with some information I collected online I have decided to just sand the handle and then coat it with board butter.

Tools

One important step that I did not photo-document properly was chamfering the edges on the front and rear side of the handle and the tools I used to finish the handle. To sand the handle I have used a small block of hard wood with dimensions about 20 x 60 x 100 mm. On the long narrow sides (20 x 100 mm) I have attaches a double-sided Tesa tape (the side that sticks stronger facing the wood) and then I would use it to attach the sanding paper.  The tape worked so well, that I had to change it only once during the whole process. Since the paper would clog fast with the wooden dust, I would use a small hard brush to give it a quick rub, so I did not have to change the sanding paper too often. This brushing worked of course better with coarser papers as with grit #1000 and finer the brush would not manage to get between the grains quite as efficiently. Still - it did help.

To chamfer the bolster I had to use a much smaller tool as the blade was getting in the way. I use a small piece of off-cut steel of about 3 x 20 x 40 mm (give or take) and used the double-sided tape as above to attach sanding paper.

I would sand the front and rear edges on the handle with every grit that I would use on the handle, but while I rounded the edges on the front side, I sanded the rear side under constant angle (about 45 deg) and did some rounding only with the finest paper. I simply like that look better.


Left: Handle after #240 grit,
Right: piece of sanded wood treated with Tru-oil.
So I have proceeded with sanding the handle. I really enjoyed how every finer grit revealed more and more structure of the wood.

After #240 grit.
After #400 grit.
After #600 grit
In principle I could have stopped after #600 grit, but since the sides of the bolster were also sanded at the same time, I went all the way up to #200 grit so that I would get (at least comparable) finish as I had on the front face of the bolster.

After #2000 grit.
After #2000 grit
After #2000 grit
After #2000 grit.

Warning: When sanding handle with metal parts you may notice that at the finer grits there will be tendency for the metal dust to 'stain' the wood in its vicinity. What happens is that the metal dust is so fine that it clogs the fine pores of the wood. I noticed it happening here at #1000 and #2000 grits. To minimise that I would only sand in the direction from the wood towards the brass and clean or change the paper after just a few strokes.

Once the handle was finished I applied a coat of board butter.


Lessons learned

  • Prepare the tang carefully for the press-fitting of the bolster. Do not allow the thickness change to be too abrupt towards the final position of the tang.
  • If the bolster does not want to fit with light hammering - take it off and work on it or the tang, otherwise it can bend and also the blade could get damaged
  • Be 110% sure that the blade is properly wrapped and will be safe from any damage (scratches, chips, broken tip, pressure marks, etc).
  • Becareful when sanding close to wood/metal boundary with fine grits as the metal dust could stain the wood.

Finished handle


The fine grain of the wood really pops unde the right light.


Wednesday, December 7, 2016

Project #14 - Mounting Aiiwatani natural stone on a wooden board

This is another project not directly related to knifemaking. Friend of mine asked me whether I could help him to mount his new Aiiwatani sharpening stone from JNS on a wooden board. I

Materials:

  • Plum wood (flat and dry), cca 3cm thick
  • Shellack (flakes)
  • 95+% acohol
  • hair brush
  • Epoxy (G/flex)
  • 5 minute epoxy
  • Diamond flattening plate from JKI
  • brass (metal) brush
  • sanding paper (120, 240, 400, 1000)
  • steel wool (extra fine)
  • marble table top plate (used as flat surface to support the sanding paper)


 have not done that before and at the beginning got a real headache researching what materials to use to seal the stone and to finish the surface of the wood. Cashew lacquer is often recommended to seal sharpening stones, but I could not get my hands on any, then there is Urushi which is rather expensive plus different modern water resistant . For wood there are many different options. Finally - I have decided to go with shellack and it turned out to be a good solution.

So - I started finding a nice flat piece of plum wood. Why plum wood? It was not too expensive, it is a hard wood and it holds up well with water around (I have 2 plum wood spoons and they are great) and it looked lovely. And it had the proper width, so I did not have to do much cutting :)

I started with cutting the board to size. I was left with a piece of about 8 x 10 cm large and I have decided to use it to test the finish.

The wood - testing

I have first rounded all corners with a file and then sanded the wood with 120, 240, 400 and 1000 grit sanding paper. With the bottom I only went up to 240 so it would not be sliding on wet surface too easily.

Left: original surface of the wood
Right: Wooded sanded to #1000 and finished with steel wool

I have mixed the shellack with alcohol at a ration 1:5 (weight). I actually first did 1:3, but that has proved to be too thick. 1:5 ratio made it easier to get an even layer on the wood.

When I was lacquering the testing piece I sanded the wood with steel wool after each coat. That has proved not to be the best idea as the coat was so thin, than I nearly completely took it of. After this experience I first did 3 thin coats on the board before I would sand it with a steel wool. I would then apply 4th coat and sand it again (very lightly). Because I have used steel wool to finish the surface it was not polished, but slightly matted (but still very smooth to touch).

The stone - testing

To test the second step I have used small piece of stone that was a by product of making fingerstones. I have flatten it with the diamond plate before put tin on a few coats of shellack then glued it to the testing board using epoxy. Since the bond was very strong I have proceeded to the main board & stone.

Piece of stone glued to the testing board using epoxy.

Preparing the stone

This was a little challenging. The stone did not have a regular shape and the bottom of it was strongly uneven. While it was not necessary (and frankly also not possible) to flatten the whole bottom side of the stone, I wanted to achieve to have contact points over full length and width at least on some areas of the stone. Even though this stone was not particularly hard, I needed 2 hours of work to get the result I wanted. During this process a short-hair metal brush proved very helpful to remove stone dust from the diamond plate. When finishing the stone shaping I was particularly careful to make sure the flattened part is indeed flat.

After about 20 minutes of flattening with the diamond plate.

After 2 hours of flattening.


A lot of stone dust was produced in the process
Once the stone was flattened I have brushed the whole bottom side and the sides with the brass brush to remove all the dust and loose little pieces of stone. Subsequently I have covered the whole top (sharpening) surface with an orange Tesa plastering tape (this is my favourite for these purposes as it does not leave any residue) and started to apply coats of shellack. Over the course of a few days I have applied around 8 coats. This created smooth glossy surface on the stone.


The stone was very thin in one place. To minimize the risk of loosing this part too early I have applied a thick layer of 5 minute epoxy from underneath to support the thin stone. This worked rather well.

Applying a layer of epoxy to support thin part of the stone.

 Preparing the board

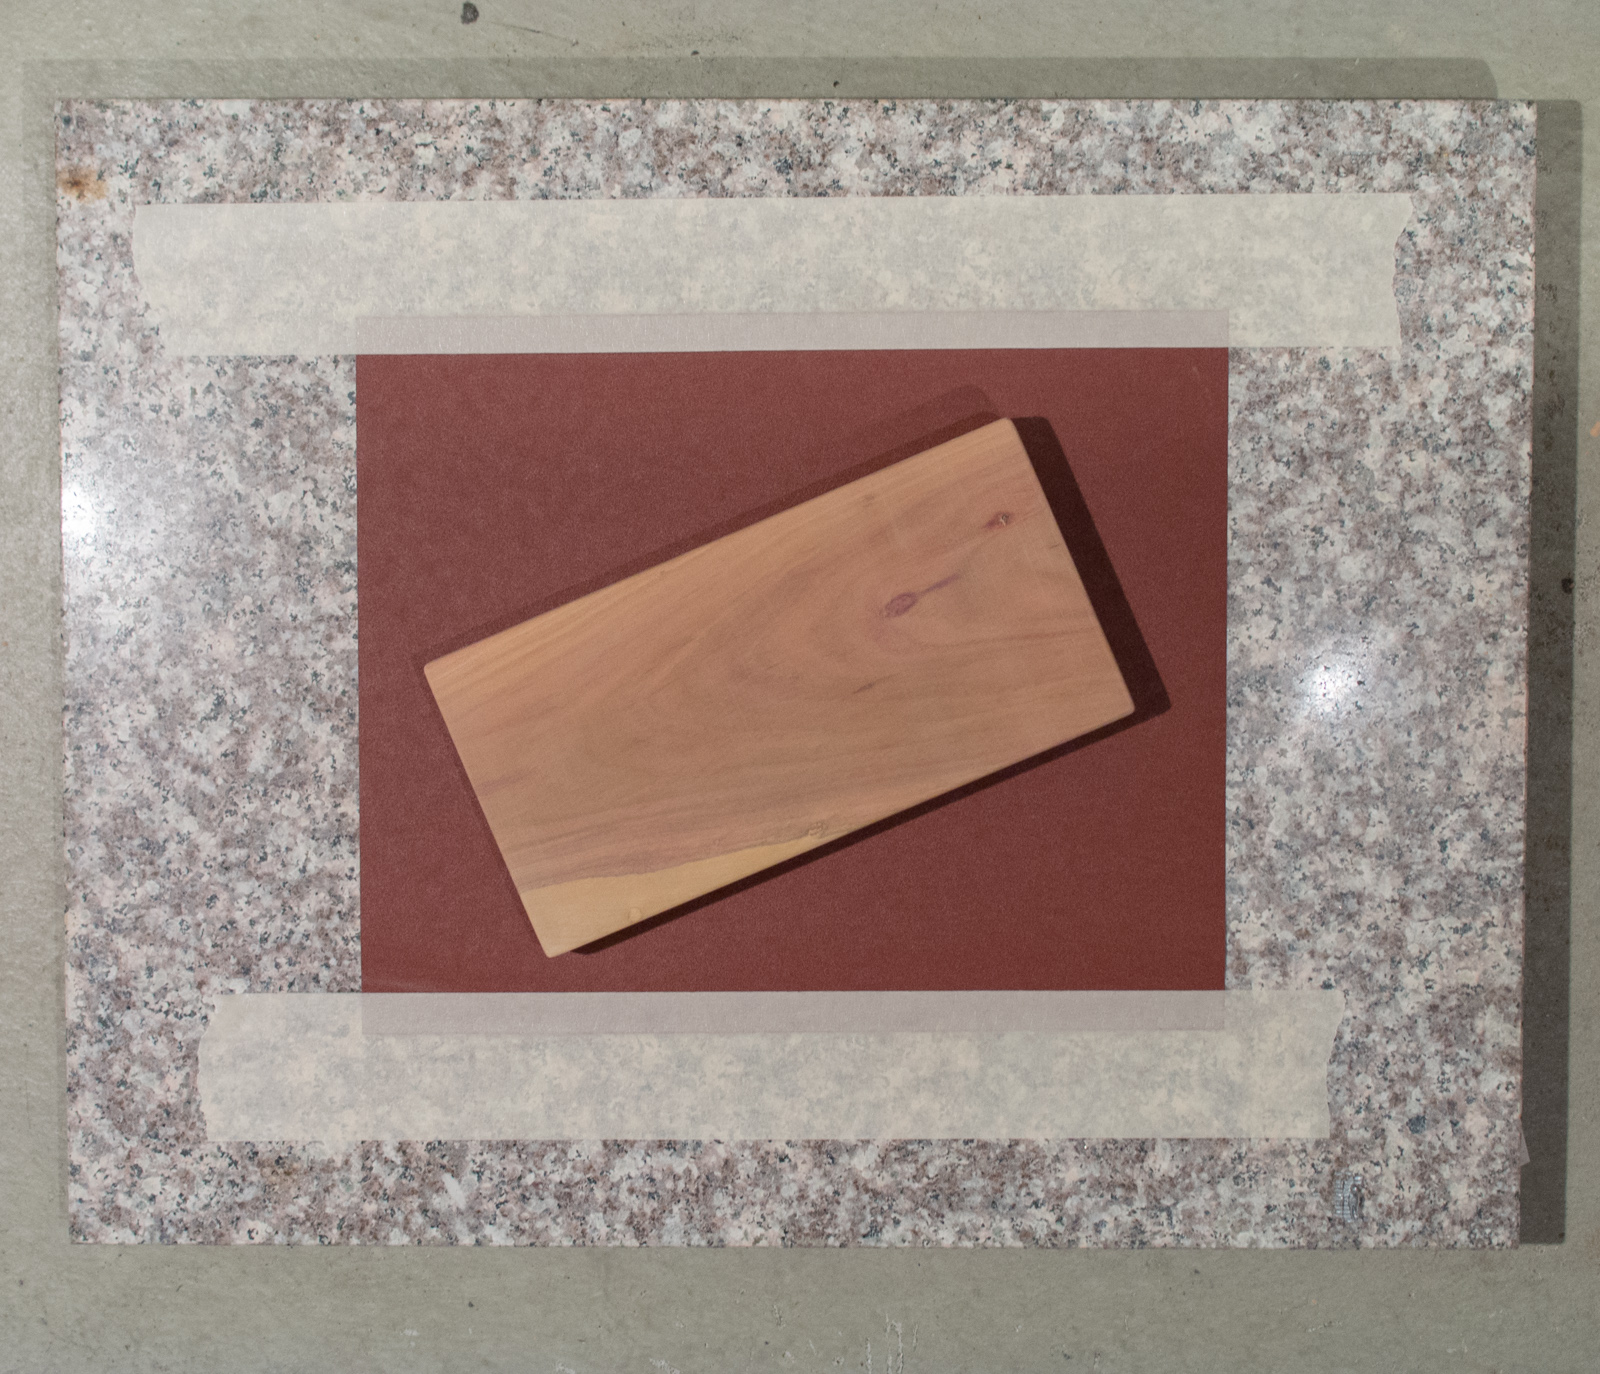
I have basically followed the steps as described in the testing. To speed up the sanding I have taped a sheet of sanding paper to a marble plate which gave me a perfectly flat surface to sand on.


Sanding the wood.

Once the wood was sanded I have applied 3 coats of shellack, then gently polished/sanded it with steel wool. One more coat and one more sanding and it was finished. The shellack really brought up the fine structure of the wood. I could not help but think that it would have made for a few lovely knife handles :)


Applying a coat of shellack to one side of the stone. 

Detailed of the finished surface

Gluing

This may sound trivial, but it proved a little tricky. One of the less ideal decisions was to chose a thin and long curing epoxy (G/flex). I really like this epoxy and have made very good experience with it so far, but being really on the thin side made the gluing a lesson in patience. The slow curing was the good part of it, as it actually takes quite a while to mix and apply this large amount of glue (and I had to mix up some more as I underestimated how much will be necessary), but being thin the glue had a tendency to run off long after I have expected it to. 

Using a clamp and machinist square as an 'anchor' to keep the stone in place
while the glue was curing.
Finished stone.

Summary

Arguably this was a relatively simple project and since I (apparently) did not make any major mistake it turned out really nice. One possible update to the future would be to grind/sand the wood from the bottom part so that board would get a slightly 'bridge' like shape standing only on the ends of the board. All stones that were mounted in Japan were done this way - I suppose to allow the wood to dry after sharpening.

Also, since this project went rather well I will son be mounting a lovely Aka-Renge shiro suita from Ohira-yama in a similar manner.

Thank you for reading, please do not hesitate to ask questions :)

Tuesday, November 1, 2016

Project #10 - WA handles for two 165 mm single bevel funayuki knives

I have got two cheap-ish 165 mm traditional single bevel funayuki knives for me and my friend, so that each of us can learn how to sharpen single bevel knives and how to put kasumi finish on the bevel and also to have a knife to filet smaller fish (what none of us does often enough to justify a 'proper' 180 mm deba).

A few words about the knives. Funayuki are today less popular than deba knives. In their construction they are not quite as strong & thick as deba knives. The knives in question weight about 150g with their original handles while a 165 mm deba would weight 200 - 250g.

Two 165 mm funayuki knives.


Since the knives were on the cheap side (which is in general not a good idea with single bevel knives as these are harder to make than knives with symmetric grind) the handles ware not too nice, just simple Ho-wood (which would be fine) with plastic ferrules (which I can not stand). So I though it why not use the occasion to improve my handle making skills :)

I have decided to make handles with 5 mm thick brass bolster and one piece of wood, this had implications on how the handle was makde.

As I started to work on the knives I found some more things to change or tweak, so here is a full list of what was done:
  • Remove the old handles (easy, as these are not glued)
  • Square up the 'shoulders' so there would be a nice fit with the bolster
  • Grind the tang to remove the scale (the original handles were burned-on) and rust.
  • Round the spine and choil (the choils were realy nasty sharp
  • Make the bolster (nice and tight) and finish the front face
  • Drill the tang and make sure it fits nicely against the bolster
  • Rough shape the bolster before the handle will be glued (and watch for the heat!)
  • Glue up the handle
  • Shape the handle
  • Sand the handle and bolster
  • Apply a few coats of Tru-oil

Handle design

This time I have decided to go with different handle than what I did so far. I would make a bolster from 5 mm thick brass plate which would be made to fit tightly onto the tang and then the handle would be made from one piece of wood. The challenge was that the handle would be shaped AFTER it was already glued with epoxy onto the tang.


But let's get started ...

Materials

  • Mora wood (from dictum.com) in 25 x 25 x 150 mm
  • Purple heart wood (also from dictum.com) in 25 x 25 x 150 mm
  • 5 mm thick brass plate
  • 0.8 mm thick black fibre spacer
  • G/flex epoxy 

Tools (apart from the obvious)

  • Wooden block with opening large enough to fit onto the tang so when you hammer-in the spacer you do your imprint the edges of the pipe you use to clear the length of the tang for the hammer
  • Self adhesive sanding paper in about #240 and #400 (or even higher) grit. Double sided tape might do the job too.
  • #40 grit belt for rough shaping of the bolster and handle and #80 grit sanding disc for final shaping seemed to work just fine 

Blade No. 1


Removing the old handles was relatively simple as these are not glued on the tang. Usually handles on Japanese kitchen knives are first drilled to nearly fit the blade tang, then the tang is heated to red color and then the handle is 'burned in' to fit the knife. That was the case also here. To remove the handles I have just used a piece of wood longer than the blade, holding the blade against the wood so that the end of the wood would be pushing against the bolster and hitting the other side of the wood until the handle would come off.

Before I started - original handles and material for the new ones.

Removing the handle showed that the both tangs had a rather coarse (forged) finish with some surface rust, so I cleaned them a little with a belt grinder.

These tangs do not look too nice, Let's clean them a little.

Once the shoulders were squared-up I have used masking tape and some carpet tape to cover the blades. before I would proceed.

Shoulders squared up, tangs cleaned.

Since I was going to fit brass bolster onto the tang I have squared-up the shoulders so that the bolster could fit without gaps (this worked only partially). I have used a filing guide to help me to file the shoulders to the same plane.

Squaring up the shoulders on the tang.
I have of course forgotten to ease the choils so I have removed some of the tape and used a 120 ceramic followed by A100 Trizact Gator belt. The result was not optically perfect, but felt very nice in hand.


Choils rounded with a belt sander.
Then I realised that I should have also rounded the spine (it hat really sharp edges), so I have removed the tape and used the A100 belt to ease them. I did not completely round the spine as I want that it can offer more support should more pressure be needed later when this knife will be used.


I forgot to round the spine, so let's do that. Belt: 3M Trizact 'Gator' A100


Now I have moved ahead and finished the first bolster-fit.


Fitting the bolster.

Once the bolster was in place and its front facing surface finished to about 800 grit it was put back on the tang, painted with a permanent maker, marked and ground to shape with a #40 grit belt.


Bolster rough shaped to slight over-size

I then shaped to bolster to an approximate octagonal shape. This is still over-sized, but I wanted to minimise the amount of the brass to be removed before the handle will be glued as a lot of heat is created in the process and brass trasfers it very fast what could damage the epoxy joint.

Bolster roughly shaped

Once the bolster was ready the handle block was squared-up, marked and drilled (3 partially overlapping holes with 4 mm diameter). I have used needle files to get the tang to fit and it was a slow. process. I have since ordered needle rasps which make the process much faster. I actually had to burn-in the last few milimeters what was a slow process with this dense and hard wood.

Fitting the handle block onto the tang - not quite there yet.

Finally - the handle block fits tightly onto the tang.
Once the handle block could be fit onto the tang it was roughly sanded before being glued onto the tang. With the next knife I have first glued the handle before shaping it.


Handle rough shaped.
Before glunig up the handle I have filed notches onto the tang. I have not done this before and it probablny is not necessary (not on a kitchen knife anyhow), but I just wanted to be sure the handle will not get loose over time.

Filing the notches into the tang
I have used G/flex epoxy to glue the handle. I love this glue - it is thin enough so that it will flow down the tang opening without pre-heating or other tricks. And it gives you enough time (cca. 45 minutes) to get all done and cleaned where necessary.

After gluing - cleaning the joint before the handle will be sanded to shape.

Once the glue has cured I have cleaned up the joint with a belt sander and moved to disc sander with #80 grit to first flatten all sides. Once that was done I would measure the handle and draw the lines to first get the distal taper (vertically and horizontally) before moving to final shaping of the handle.

Sadly, I have found out that I did not do good enough job of fitting the handle onto the tang during gluing resulting the handle sitting under an angle against the bolster what resulted in an obvious gap on the upper side of the handle. Lesson earned - take more care next time.

Flattening the handle sides before moving to final shaping.

Once you start grinding the brass bolster in the proces - keep checking the temperature as the glue joint could be damaged or get loose.

I would stress that it is important to take the handle into you hand and check whether the shape and size is right. I needed several iterations to get the size that feeled 'right'. It is way to easy to make the handle too large.

In the middle in the final shaping - still not quite there yet.


And this is how a poor handle glue-up job looks like. See that gap on the top?


Once the handle was sanded to its final shape it was time for hand sanding. This was different to 'normal' WA handles as these can be finished before being mounted onto the tang. Here the sanding had to be done to a handle already glued onto the tang.

To get the job done I have used a small woodeb block of about 10 x 3 x 6 cm and self adhesive sanding paper from 3M (Gold Stikit) in #240 and #400 grit. I would attach a piece of about 10 x 3 cm to the block and sand each facet of the handle.

Important: Since you have thick bras bolster next to much softer wood, you may sand a 'dip' in just before the brass. To avoid that I would first sant just the wooden part and skipping last centimetre and the brass bolster. Then I would switch to much smaller piece of wood and use only about 2 x 4 cm large piece of sandpaper and sand only the bolster WITHOUT leaving it - so that I would not sand in that dip.

I also use the #240 grit to ease the edges on the brass bolster.

Once I was done with #240 grit I would do the same with #400. In the future I plan to use normal sanding paper together wit 2-sided tape as I would like to go higher than #400 grit - in particular because of the bolster. The wood does not really need it.

Final finish would be done with steel wool and then the handle was off to the first coat with Tung Oil.


Applying first coat with Tung Oil

Blade No. 2


The second handle was made in a very similar way. Here are a few details I have missed to photograph with the first one.

Working on the bolster I went up to 2000 grit.

Bolster finished to about 1200 before final fit.
However during final fit it showed that the fit was too tight and hammering on the bolster caused the brass to raise a bit around the tang. So I have carefully removed the bolster to re-sand it.

Bolster after first fitting - you can see the raised area on the right side.

Bolster removed after inital fit - you can see how the tang shoulders
 pressed themselves into the brass.

Bolster re-finished to 2000 grit.

Then followed rough shaping of the bolster and drilling of the handle block.

Bolster ready for rough shaping.
I have decided to use clamps to assure a tight fit of the handle relative to the bolster.

Important: When dry-fitting the handle to the tang&bolster watch that the handle is in axis with the knife. If it is not you have several options to correct: sand the front face of the handle (where it will contact the bolster), file the tang opening, or bend the tang a little.


Reading for gluing of the handle.

The clamping solution worked even though it needs some improvements - ideally a small dedicated vise/clamp as it was a little clumsy this way. The point is - make sure that there is not gap between the bolster and the handle.

Using  2 clapms to make sure the fit is tight. Only little force was applied.

Once the glue was cured the handle could be rough and the final shaped.

Drawing the lines for rough handle shaping.
Subsequently the handle was tapered in vertical direction then then final shaped. Since I already had the first handle finished I knew what size I want it to be so it took fewer iterations.

Handle rough shaped and ready for final shaping.

Lessons learned

Quite a few this time, actually...

  • Make sure you have all the adjustments made to the blade necessary or intended (choil or spine rounding, straightening of the blade, re-finish of the blade) before you start working on a handle. I did not want to re-work the blade finish what made fitting the bolster harder as the tang did not have a well defined shaped.
  • When drilling the opening in the handle for the tang drill 1 cm deeper than you need and then keep adjusting the opening with files or rasps until you get a comfortable fit without too much wobble. If the fit is too tight you may have hard time gluing the handle tightly to the bolster (see above) without any gaps.
  • Be super careful when shaping the handle already glued to the knife - think how much work it would be to remove it if you make a mistake ;)
  • When hand sanding the the handle make sure that when you sand the bolster you do not run on and off it with sanding paper as you will tend to create a dip just behind bolster. Keep the sanding block over the bolster while sanding (or avoid the bolster all together while sanding back part of the handle
  • If you plan to finish the bolster to semi-mirror polish with a steel wool, than you want to go to about 1200 sanding paper before that.
  • Honestly - I am still figuring out how to finish the bolster evenly. The problem is - you finish the front side first, than you finish the sides during hand sanding, but you also need to round the edges of the bolster and ideally you would want to blend it all together. 
  • If you plan to use steel wool it may be good idea to put some tape on the front side of the bolster and on the transition from the bolster to the blade tang as the steel wool tends to get everywhere, it will stuck to whatever tiny bits of epoxy are left at that joint and it will be hard to clean afterwards.
  • Shorten the handle before you start to sand it to shape. I forgot that with the first one. Also - you can use the rest of the block to test different finishes. Just finish it the same way as you plan to finish the handle.
  • When power-sanding wood be careful not to burn the wood, Not only you may damage the wood (if you are close to final finishing), but even more importantly you will clog the belt or sanding disc in no time.
  • If you plan to make similar kind of handles where you fit the tang of the knife in relatively narrow opening - do get a few needle rasps  - the 160 mm long ones from Corradi are perfect for the job. I just got them and only briefly testing them and they will speed up the job considerably.


Please do not hesitate to ask questions - I love questions :)

Finished knives

In general - far from perfect, but they do look nice, feel nice in hand and will most certaily serve their purpose. I do have a lot to learn.
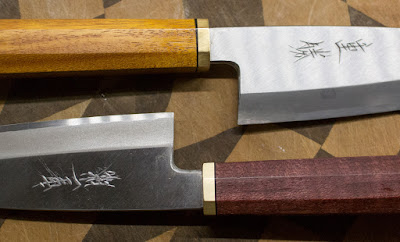


And here is that gap again. It is going to haunt me for quite a while I guess.