Project #27
A friend of mine expressed the wish for a large (80+ cm long) magnetic holder and since I have made one in the past I though that this would be an interesting option to try to make one from nicer wood and with better fit and finish.The objective of the holder is - dark brown without red/orange tones. The knives should hold securely and should not tend to rotate.
This project was the first of the two to work and and finish and I have spend several times as much time on it as the smaller one. Not because of the size difference (which of course does play a role), but because I was working out some details - in particular the surface finishing.
Project #29
This project was started as I was finishing the large magnetic holder from the project #27. There is really not that much new stuff here, but the main point to write down this considerably shorter post was to emphasize how much more efficient one will get when certain processes have been tested and optimized.This knifeholder was meant for my parents to hold just 3 or 4 of their most used knives. I decided to
Just a reminder - I needed about 20 working hours to get the larger (by factor 3) done. Of course, it is considerably less work to sand and polish smaller piece of wood, but without the need to test how to distribute the magnets and how to proceed with the surface finish was the main time saver.
Design
Since I do not posses a router or a milling machine I had rather few options how to mount magnets just about 2 mm behind the front surface of the wood. I have decided to use the technique I have used some time ago (before I started with knifemaking) to make a simple magnetic holder from a piece of beech.
With my first holder I have used magnets with 10 mm diameter and 5 mm thickness with 20 mm spacing (or in other words 10 mm gaps between magnets). It turned out that the magnetic force was just barely sufficient to hold the knife so I decided to get stronger magnets and do some more testing.
I decided on magnets with 15 mm diameter and 8 mm thickness. These are of course considerably stronger (and unfortunately also more expensive) that 10x5 magnets and thus gave me more freedom about spacing/positioning. To get the spacing right I used a beech board and did some test drilling and using a piece of stainless steel to judge the magnetic force. It turned out that space between magnets of 5 mm gave a very reasonably homogenous magnetic field that was more than powerful enough to keep the knives in place.


Once the scratch was gone I would refine the surface with 180, 320, 600 and 1000 grit. I also rounded the edges a bit.
Not show in the photos is a surface crack that the wood had on the back side. I used a CA grain filling glue to fill it.
In parallel I did the testing of the magnet distribution
The magnetic board was going to be mounted on a wall with 2 large screws. Because of the large size and weight (with knives) I wanted to make some inserts that would better redistribute the pressure of the screw hears. I do realize that this was probably not really necessary, but it sounded like an interesting little detail I decided to try to make.
The diameter of the screw head was about 12 mm, so I got a stainless steel rod, cut off 2 pieces about 6 mm thick and finished the surfaces.


Once the surfaces was acceptably well finished I have drilled the two discs so that the shaft of the screw would fit. OK. I have drilled the first, realized that the drill bit wandered a bit, so with the second I used a centering drill bit what helped a lot.


Magnets. First some words of caution. With 15 mm diameter and 8 mm thick there are getting quite strong. I found it impossible to separate two magnets with my bare hands (main reason being the suboptimal grip).
With my first holder I have used magnets with 10 mm diameter and 5 mm thickness with 20 mm spacing (or in other words 10 mm gaps between magnets). It turned out that the magnetic force was just barely sufficient to hold the knife so I decided to get stronger magnets and do some more testing.
I decided on magnets with 15 mm diameter and 8 mm thickness. These are of course considerably stronger (and unfortunately also more expensive) that 10x5 magnets and thus gave me more freedom about spacing/positioning. To get the spacing right I used a beech board and did some test drilling and using a piece of stainless steel to judge the magnetic force. It turned out that space between magnets of 5 mm gave a very reasonably homogenous magnetic field that was more than powerful enough to keep the knives in place.
Materials
The lager (84 cm long) holder was going to be made of Java Rosewood (Sonokeling). The reason for this particular choice was that the wood was supposed to have deep brown color with some figure, but without yellow or orange tins.
The smaller (26 cm) holder was made of two tone Ziricote as I found a really nice piece that I just could not leave in the shop :)
Let's do this
As I mentioned, I did not have any particular tools. Since I did not manage to locate a proper mill bit, I got a 15 mm wood drill bit and ground off the tip in the middle. While this works, it was a very hand made process and since my hand slipped here and there, what meant that the drill bit did not remain too sharp what made the drilling a less enjoyable (but worked well enough).

Of course - the wood had to be cut to length. That was a 2 minute job including hand sanding.

But what was worse was the fact, that the future front surface (that was planed and would have not required much work) had about 40 cm long ridge (probably a scratch of some sort) that was more than 1 mm deep That meant that I had to sand it until it would disappear. I used about 10 sheets of 80 grit sandpaper to get that done.
 |
| Cleaning up the surface. You can see still see the scratch on the right side. |
 |
| Finishing the coarse sanding. |
Not show in the photos is a surface crack that the wood had on the back side. I used a CA grain filling glue to fill it.
In parallel I did the testing of the magnet distribution
 |
| Testing the magnets. The piece of RWL34 simulates a knife. |
The magnetic board was going to be mounted on a wall with 2 large screws. Because of the large size and weight (with knives) I wanted to make some inserts that would better redistribute the pressure of the screw hears. I do realize that this was probably not really necessary, but it sounded like an interesting little detail I decided to try to make.
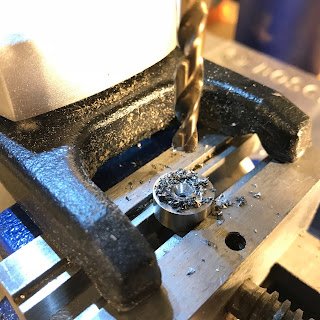
The diameter of the screw head was about 12 mm, so I got a stainless steel rod, cut off 2 pieces about 6 mm thick and finished the surfaces.
 |
| Since most people making stuff in their shed have no idea how to cut stainless rod, here is a photo that explains it all :) |
I have first coarse flattened and finished the two discs with a belt grinder and then finished up to 600 grit by hand with a sandpaper.


Finally I have used a special bit with 90 deg. head and 3 edges on the tip to allow the head of the screw to sink. The result looked and worked better than I hoped.


Before I have moved to final surface finished I have drilled the holes for the mounting screws. for some reason I did NOT tape over the locations where the holes were to be drilled and of course did get some minor tear out. Oh well.

Once this was all done then the time came to drill the holes for the magnets.
I have used pieces of metal spacer material to set the bottom-most position for the drill. This is a bit of a lame tip, but it works 100% :)


Because of the partially dull drill bit drilling the somewhat oily wood was not too nice - the drilled wood dust and pieces would tend to overheat and clog the bit.
 |
| In this photo you can see the long crack covered with glue. |
Magnets. First some words of caution. With 15 mm diameter and 8 mm thick there are getting quite strong. I found it impossible to separate two magnets with my bare hands (main reason being the suboptimal grip).
To prepare for gluing I would first use a piece of knife steel and attach single magnets to it - with the same polarity up and I also marked this side (I have not idea whether it was north or south). The reason for doing this was that I wanted the polarity to be reversed on neighbouring magnets (in both vertical and horizontal direction. I do not have a proper proof why this should be better, I just had that impression when I was testing the different constellations.


 |
| The spacing between the magnets is just a matter of safety. |
I have used a 90 min. Epoxy from UHU. One could use any epoxy as long is it cures slowly so that you do not have to mix fresh batch every few magnets. Once mixed - I would first apply one drop of epoxy in every hole (not all of them in one go - I worked with batches of 20 as I was not sure how much epoxy I was going to need), put the magnets inside (yes - I did put the whole board on a piece of steel so that the magnets would not tend to jump around) and then apply a layer of 2-3 mm of epoxy on top of each magnet.
I would use a smaller hot air gun to heat that drop of epoxy before putting each magnet in place and as well after I applied the larger amount of glue so that it would distribute evenly.

Once all the magnets were glued in place the time has come for a final surface finish. The back side was sanded up to about 600 grit. The front face was sanded up to 1000 and buffed. I have used my drill press for the buffing. Since then I was told that this is not a great idea as it applies tangential force on the head which destroys it over time.
 |
| The dust was everywhere ... |
 |
| ... as was used sandpaper. |
Surface finishing
Up to this point it was all clear how to proceed. But nut the real fun was about to begin. First of all the the future owner and his spouse had different opinions how much glossy the surface was supposed to be. To accommodate for some tests I have partially polished the back side of the holder + I have decided to use 3 different finishing materials:
- board butter
- Tung Oil
- Hardening Oil from Asuso
With my very limited experience in woodworking I have simply applied a coat of each of the materials to the surface and let it dry. How naive.
The next day - when I expected the surface to be all cured and ready for inspection & further coats - the reality was different. The Tung oil and Asuso oil surfaces had small patches of apparently uncured. Not knowing what to do I have turned to one woodworking group on FB for advice and learned that this kind of wood needs the first coats to be applied thinned considerably. But first I would clean the already applied surface with a pure thinner and allowed it to dry completely.
Given this experience I have decided to just use the hardening oil from Asuso which I prepared thinned 1:3 (oil:thnner), 1:2 and 1:1. This worked much better and solved the problems with curing till the next day.

 |
| Yes - I have used our smaller restroom for the whole oiling procedure - the reason being that it was ventilated and and I could crank up the heating to speed up the drying while the dust remained in check. |
Once the testing was over (the decision was the buffed surface) I have applied 3 coats 1:3, 2 coats 1:2 and 2 coats 1:1. I did not use a pure oil at all.
The second holder
In principle I followed the same path minus the inlays for screws:
 |
| Ziricote cu up to size. |
 |
| Drilling the openings for the magnets |
 |
| ... sanding ... |
 |
| ... gluing the magnets ... |
 |
| ... whoops, someone forgot to drill the holes for the screws ... |
 |
| ... oiling (some testing first) |
Lessons learned
- I have barely scratched the surface here, but the surface finishing of wood is a large area which I would like to inspect more in the future.
- I need to come up with a more elegant way to make these than drill through the whole thickness of the wood - without getting further powered tools. Maybe with a Japanese hand wood saw.
Finished holders
I am happy to report, that both holders have since been delivered and are in active use and work well.


its the best method to make magnetic knife holders by using wood work.
ReplyDelete