This is a tool-related project. I was asked whether I could thin, refinish and re-handle a 170 mm Takeda Aogami Super santoku, which, as many of Takeda knives made in the recent years, have the grind a bit on the thick side (and hit-and-miss forging work as it later turned out) and profit greatly from thinning (pushing up the shinogi line).
This kind of blade work was my first and so it took me a lot of time and I did not manage to avoid making some mistakes as you can read below.
 |
| The knife in original condition. |
 |
| Detail of the original grind |
Thinning jig
The main part of this task was to move the shinogi line higher up the blade face and thus make the primary (flat) grind more acute and then put some decent finish on the blade.
To do this kind of job requires either a very stable & experienced hand (none of my hands fits that description), or a jig of some sort that would allow to make the most of the material removal in a well controlled manner. I was considering to do this free hand, but Jon Broida pointed out that I could actually (after some work) use my bevel grinding jig which does something very similar, but with a file (check out my
article on this topic)
To make re-adjust the jig for this kind of work two main parts need to be made:
- A way to attach (in a secure manner) the Atoma 140 diamond plate to the guiding rod of the grinding jig
- A holder or base to be able to securely fix the knife that it would hold the blade in a well defined position AND keep the blade from being scratched or damaged accidentally. In particular the cutting edge would need to be protected from accidental 'bzumping into' as that could leave some serious chips in the high HRC and thin blade.
To make the attachment of the Atoma I used a piece of wood and a double sided Tesa tape (so that I would be able to attach and remove the Atoma without making some complicated clamps.
 |
| Atoma holder for the grinding jig - top view ... |
 |
| ... and the bottom view |
Attaching the blade for thinning was a bit less straight forward. I was considering different complicated solutions (including special clamps or Nd Magnets), but I finally went with the simplest option and I have used a double sided tape to attach the blade to a pre-shaped piece of reinforced multi-ply board.
 |
The frame of the thinning jig, and an additional board with
the tape already attached. |
Since the kurouchi on the Takeda is not particularly strong some of it came off with the tape later, but still - this was probably the best solution aside from making a custom knife holder with neodymium magnets (which I may consider for the future). To mitigate this problem somewhat I applied a orange masking Tesa tape to the blade first before attaching it to the double sided tape (which was much more 'sticky'). The orange Tesa holds pretty well and as experience shows it can be removed without leaving any residue.
Of course I removed the original handle as it would be getting in the way. This is a great advantage of the traditional handle mounting in Japan. Once the new handle will be installed, the original can be used for a different knife (it is a fine handle, after all).
 |
| Orange Tesa for a blade protection. |
I did not use any edge-damage-protection that would prevent making the stroke with Atoma too long, jumping off the blade and inevitably bumping into the cutting edge with the front edge of the plate. Simple solution would have been to put a clamp on the guiding rod so that it would not be possible to jump off the blade, but that would have prevented the rather convenient cleaning of the Atoma with a water spray (for which the whole Atome/rod part needs to be taken off the rest of the jig. But since there were plastic guides on the front and back side of the Atoma holder, the very occasional contact with the cutting edge did not leave any damage, but I do plan to upgrade this in the future.
Refinishing the Takeda
Once the jig was finished it was time to put it to some good use. Before starting with the thinning I would paint the edge with blue marker to be able to see the progress. I wanted to avoid grinding past the cutting edge and since the knife was sharp with basically zero edge thickness, I had very little room for error.
 |
| Blade is attached to the jig, edge painted. The fun can start. |
I used water spray to keep the blade wet - the excess water would drop to a bucket I have put underneath.
I did not calculate the grinding angle - at angles this small that would not be precise enough as it is hard to place the blade at a well defined angle relative to the jig (the tape would give a little, etc.), so I just first checked what would be the angle of the original grind and then go down a little.
I would use back and forth movements while grinding, but I would always move along the edge during each stroke to minimize the risk of uneaven results.
 |
| After a few minutes of careful grinding. |
Since I used Atoma 140 diamond plate for the work (the fastest metal removing solution without going to some powered tool) it was necessary not to apply too much pressure, as that is something that can shorten the usable life of the plate considerably. Great help in this regards was the fact, that the Atoma attached in the holder together with the metal guiding rod had its own weight, so I was just moving it up and down without applying any additional pressure.
When getting close to finishing one side I would leave a very narrow stripe of blue (= not ground) of the blade just behind the edge. The reason for that that some more material will be removed later when finishing the blade on stones and I did not want to waste the blade height for that. It would also leave me a little room for corrections.
 |
Grinding with Atoma finished with a narrow strip of blue paint
still present. |
Using a grinding jig like this gave me a very good consistency of the grinding angle along the blade. The side effect was, that I could not try to compensate for imperfections in the forging work. In particular the area close to the tip on the right side was a little thicker what pushed the shinogi further up the blade.
 |
Shinogi like at the tip went up as the tip was a little
thicker than the rest of the blade. |
As I mentioned I did some trial-and-error tuning of the grinding angle when working on the first (right) side of the blade. Once I switched to the left side I kept the very same angle to keep the blade grind as symmetrical as possible (within the precision of the whole jig).
Once the right side was finished I would measure the width of the bevel and painted a line of the left side - to have an estimate where the shinogi line should be once the left side will be finished. Should the actual grinding angle not be the same as on the right side, I would see that I would either approach the designed shinogi too soon (then the angle would be too small), or I would reach the cutting edge before the new shinogi would (than the grinding angle would be too large) and so I could make adjustments if necessary (though that was not the case).
 |
| Left side ready for the grinding, shinogi line marked on the blade. |
I am happy to say that the left side was forged more evenly and the resulting bevel had a rather constant width.
 |
| Left side finished. |
 |
| Look at those scratches, there is some more work to be done. |
New handle
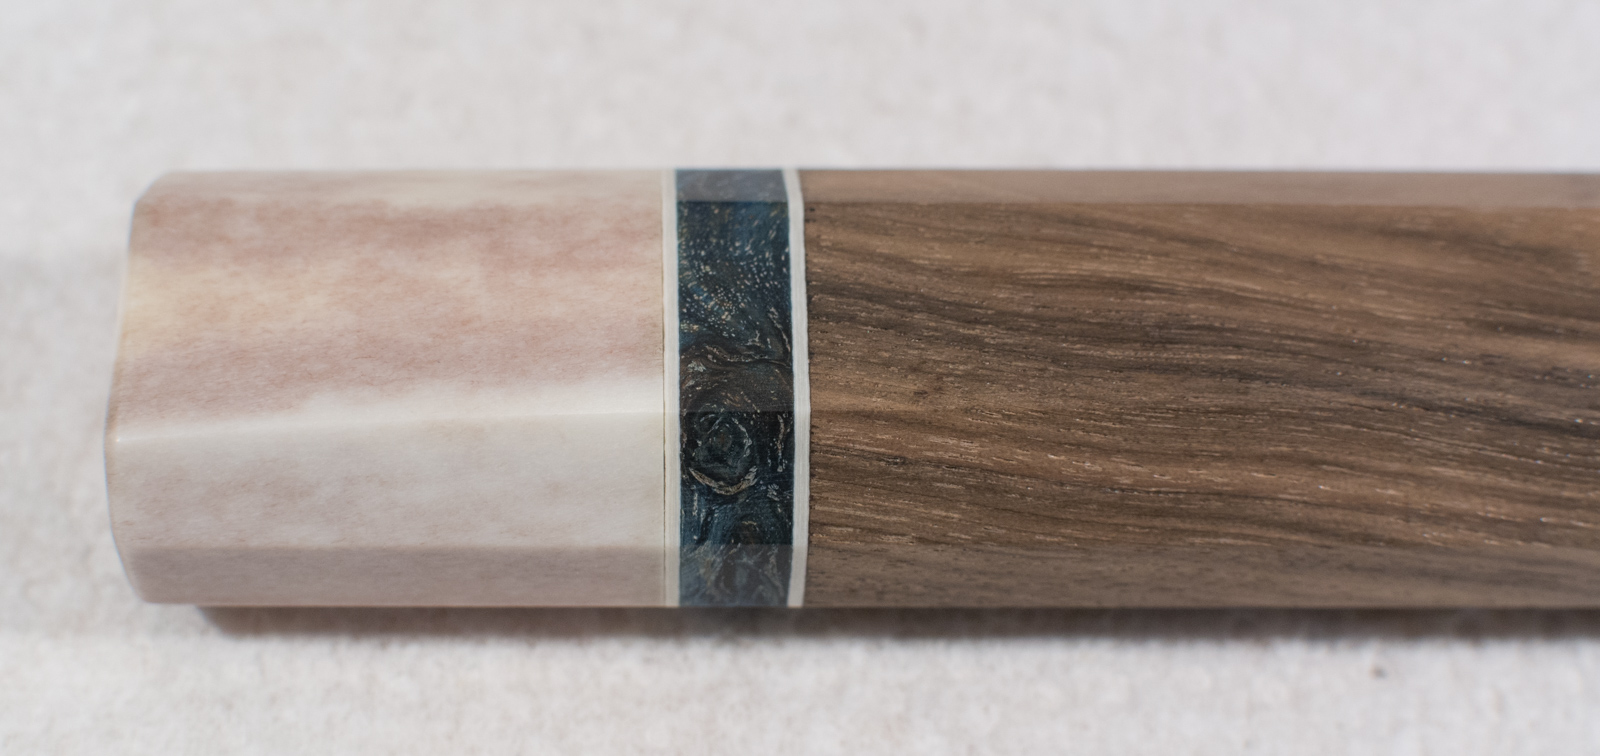
At first the handle was supposed to be just a simple dark-ish wood with some light color ferrule, but then the taste changed and the request came to add some color. So we finally agreed om the following construction:
- reindeer horn ferrule (I got a nice piece from Robin Dalmann)
- blue dyed maple spacer
- Turkish walnut body of the handle (lovely wood - nice to work with and rather lightweight)
- blue dyed maple end cap.
- white fibre paper spacers
 |
| Materials (minus the butt cap) |
The construction of the handle was going to be a 'standard' one with the addition of the piece of dyed maple on the butt of the handle. So I dowel would go through most of the length of the handle.
As usually I would start with squaring up the handle block so that I would be able to drill it in a well defined way (and have the top of the handle as square to the drilled hole as possible. Then cut ca. 30mm long piece of the horn and drilled it too. Since the dyed maple spacers were rather thin, I have clamped them to a piece of wood for the drilling, to minimize the risk of them breaking. That worked well.
 |
Drilling the handle block. I know these are boring shots, but somehow
they became part of my articles :) |
Once all materials were prepared I did a dry run - to make sure they all fit together. It is important to make sure that once assembled the parts fit together well without any gaps. The gaps can be created by either not having contact surfaces perfectly flat, but also if they are not square to the common axis (defined by the drilled hole). If you look closely to the finished handle you will see that I indeed did get a tiny gap between the ferrule and the first spacer. It is filled with epoxy, so it is not a danger to the handle, but it should not be there.
Tip: Rarely you will get a perfect gapless fit of the ferule and body of the handle - in particular with horn (which is round and thus not easy to clamp well when drilling). However if you are not far off, then rotating the ferule relative to the handle block (while having a dowel inserted) may allow you to find a position in which these two parts match well. If I do that I then mark their relative position and I use it when gluing the handle.
 |
| Dry fit of the handle before gluing. |
This handle was a bit special as it had also a butt cap. Since I did not come up with any simple and fast solution how to secure it better, I just glued it with an epoxy without any dowel. It should be fine as it is rather short, but ideally there would be some material connecting the body of the handle and the butt cap. I have used the G/Flex epoxy as it proved very strong and glues wood very well.
 |
| About to glue the butt cap to the handle block. |
Once the first glue cured I could glue the whole handle minus the dowel which I glue in a separate stage later.
 |
| Gluing the handle |
Since recently I have started to use my slightly adjusted handle gluing press (which I originally built for gluing of through-tang knives like finish puukko knives with birch bark handles) for gluing this style of WA handles. It allows me to clamp the glued-up handle with a temporary dowel inserted. Once the handle is clamped down I then carefully remove the dowel. This has 2 advantages - it allows me to make sure that all components are aligned and - it allows me to remove most of the glue that would leak in the drilled hole (and thus make it later hard to fit in the dowel). Important is to use slow curing epoxy so that one has enough time to clamp the handle, make sure that every is at the right place and remove the dowel before the glue starts to cure.
 |
| Gluing the handle with the temporary dowel still in place. |
Once the the glue is cured (the next day) I would first grind off excess glue and spacer material that sticks outside the dimensions of the handle block.
 |
| Glued handle before cleaning up. |
 |
| Glued handle cleaned up and ready for the next step. |
At the time of writing this article I have already added a small band saw that helps greatly with handle making to remove bulk material or to cut large blocks to smaller ones. But when I was making this handle I still used a belt grinder to size the block down close to its final dimensions. After that I would flatten all 4 sides by hand with a #80 sandpaper attached to a stone sanding block.
At that point I would scribe centre lines on all sides, mark the exact dimensions for the handle (including the distal taper) and remove the removing material on a belt grinder and flatten again.
 |
| Handle close to final size. |
Once that has been accomplished then it was time for the most 'sensitive' part - grinding the octagonal shape - something what I usually do with the small (125 mm in diameter) disc sander.
 |
| About to start putting octagonal shape on the handle. |
This part of the process make a lot of room for a mistake that may not be possible to correct, because once you ground too much (or under a wrong angle), than you may need to start over.
Of course - slight deviations from 'ideal' angles are OK (none of the normal Japanese handles are perfectly symmetrical), but I am trying to get some reasonable level of symmetry and consistency.
 |
| Handle with octagonal shape ground with #150 grit disc sander. |
I made this handle slightly larger than the original and since it was a handle for a very lightweight blade, I have decided to grind in some additional taper from sides, to make the ferrule thinner when holding the knife in a pinch grip. I did that just by hand on the sanding block as that gave me most control. Once that was done I would proceed with finishing the handle on a sanding block with #180, #320, #600, and #1000 grit sandpaper and also chamfering the edges of the handle.
At this stage I asked the customer whether he liked the handle and once I got the green light I have made a dowel from beech wood, cut the slot with a band saw, then widen it with a #120 grit belt so that the blade would fit well and glued it inside the handle with an epoxy. Then it was time for the final surface finish of the handle.
Since the Turkish Walnut is not an oily wood I have applied a few thin coats of grain sealer (always allowing the coat to cure fully), then polished the handle and finished it with a few very thin layers of Tru-Oil using the 'Dalmann technique' (sorry Robin :) ) - that is applying a coat of Tru-Oil and immediately polishing the handle with paper Towel. This would mean than each coat would be very thin and the handle would not need any additional sanding or polishing.
 |
| About to apply the grain sealer. |
 |
| Finished handle. |
 |
| Finished handle - you can see the distal taper of the ferule. |
 |
| Finished handle. |
Before mounting (gluing) I would do the bulk of the finishing of the blade on stones. Remember - at this stage the blade has still that 'lovely' finish from Atoma 140 ... which is pretty awful and coarse.
Refinishing the blade
I have used the following stones in the process:
- Bester 220
- Gesshin 400
- Gesshin 2000
- Gesshin 4000
- Ohira Uchigumori
- Finger Stones from Uchigumori
I started on Bester 220. For its grit this stone does not wear that fast and it removes steel quickly. The main point here was to remove all the scratches left by the Atoma. Still - it is a muddy stone what on one hand makes it easier to leave a more even finish, on the other hand the thick mud may get inside low spots and 'make them disappear' so that you discover them at later stage ... and must go all way back to remove them :)
After Bester 220 I moved to Gesshin 400. This is a very fast stone that leaves very even finish, but it also wears very fast and makes a lot of mud. It leaves a very nice finish,
 |
| Finish from Bester 220. |
 |
| Finish from Gesshin 400. |
Gesshin 2000 is mediun hard stone (though still creates some mud). It is very fast and removed the scratches from the 2000 stone rather quickly. The Gesshin 4000 is even harder.
Feeling under pressure I quickly moved the the Uchigumori and at that stage it was starting to become obvious that I have overlooked (more like ignored) a few low spots. from the scratch pattern (nearly perpendicular to the cutting edge) it was obvious that they are from the Atoma. One can also see in the above photo that the low spots go down to the cutting edge and actually a slight 'dips' developed as I was working on the finish. Oh great.
 |
| Two low spots well visible - still showing the scratch pattern from the Atoma 140. |
It meant that I needed to go all way down and redo all the finishing. I decided to go to Gesshin 400 for this job, but first I would put the knife under 90 degree to the stone surface (like I would want to cut the stone) - fix the blade profile so the dips would disappear (the knife lost some 0.5 mm of the blade height in the process). To make a low spot disappear one needs to grind all the remaining areas until the low spots are not low spots anymore and then keep grinding the whole bevel until the scratches from the low spots disappear. and then refinish the blade. And that is exactly what I did and it took me additional 2 hours of careful work.
Once I got the bevels fixed and finished up to Gesshin 4000 I decided to mount the handle and make the very last steps of finishing and sharpen the knife afterwards.
 |
| Knife ready for the handle to be mounted. |
Just before I would start to glue the handle I would give it a coat of board butter, to minimize the impact of wiping some parts of it with Toluene later when cleaning it from the epoxy.
Since recently I have started to mount (glue) the handle in 2 steps. First I do the gluing itself - I mix the glue, heat it up with a hot air gun so it becomes less viscous and pour it inside the handle. Than I warm up the tang and slowly insert the tang - trying to allow the air to escape. After that I make sure I remove all the excess glue from the blade and the handle (I use paper towel and Toluene for that) and then I allow the glue to cure.
During curing (mostly because temperature related volume change) the epoxy would slightly contract and thus empty voids would appear next to the blade at the top of the ferule.
The next day I would therefore mix a different - somewhat faster curing (15 minutes working time) epoxy to fill the voids. I would again use the hot air gun to make sure the epoxy fills the voids nicely and that air bubbles do not remain trapped in the epoxy. And I would wait until the epoxy would start to get a little thicker as it starts to cure. At this stage I would use small pieces of paper towel wrapped around the wooden ice cream sticks dipped in Toluene and wipe the excess epoxy away. The reason for letting the glue get a little thicker is to avoid 'pulling' it out of the voids I am just trying to fill. Once the glue gets thicker this does not happen anymore.
 |
| Gluing the handle. |
 |
Allowing the glue to cure. Yes, I need
a better solution to keep the blade upright. |
 |
| Filling-in the voids. |
Once the handle was mounted I would give it again a coat of board butter for the good measure and then finish the bevel on the Uchigumori stone and finally even out the result with Uchigumori fingerstones. And then the knife was finally finished.
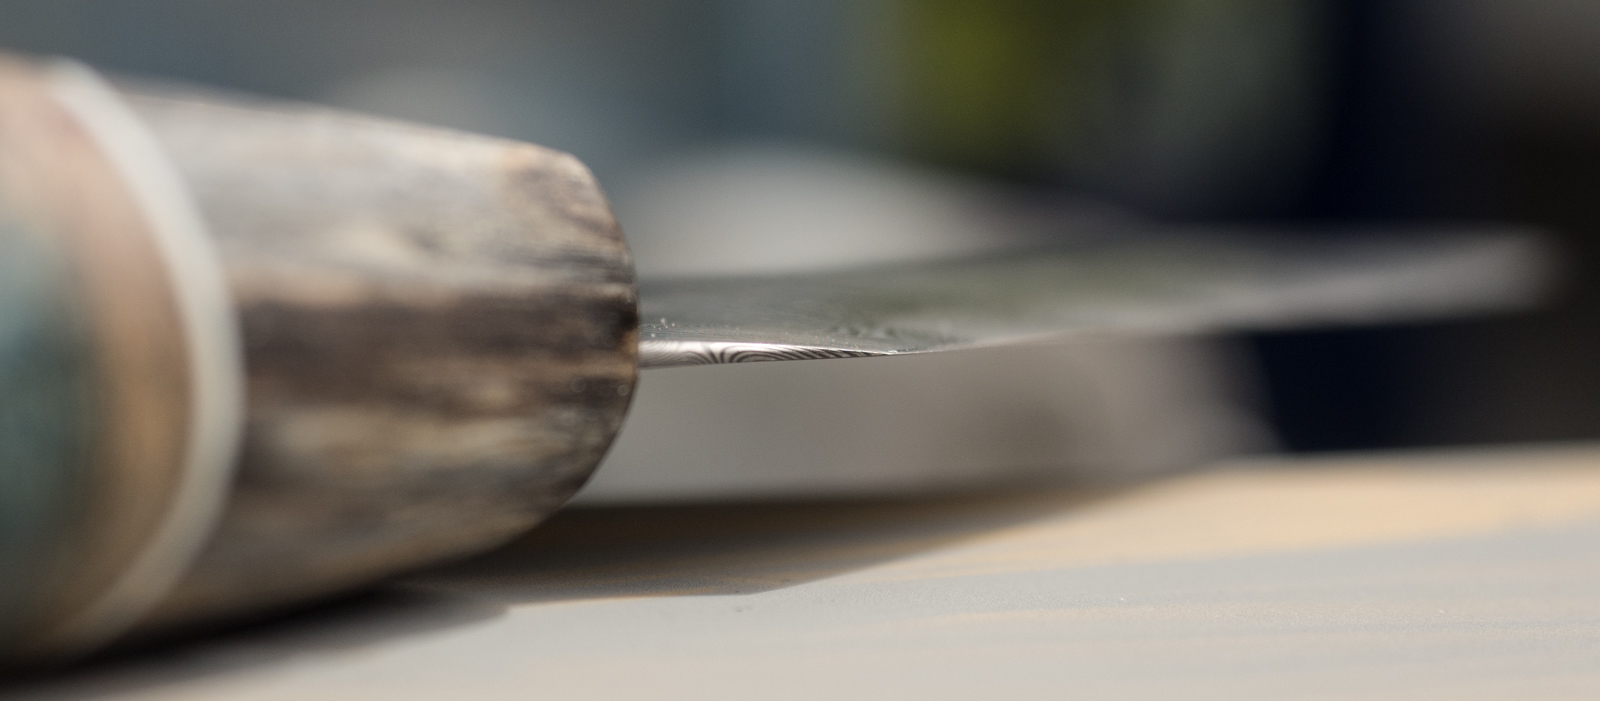
Finished knife
(photos taken before final sharpening of the cutting edge)


 |
| Here a tiny gap can be seen between the ferrule and the spacer. |
Lessons learned:
Lots of stuff :)
- Be very careful when grinding close to the heel or to the tip - if you do (even only just partially) grinding movements that are perpendicular to the cutting edge (instead of sweepping movements under angle), than you have a good chance to grind in low spots. If these are shallow enough, you will not notice them until later when finishing the bevel on stones. You do not want that to happen.
- Do not grind the bevel down to 'zero grind' (or 0 thickness at the edge). Once you will go to sharpening stones for finish you will need some more material to be removed before the scratches are gone PLUS since it is not really possible to keep perfectly the same angle and thus will start to loose material at the very edge what will create uneven profile (which you will have to correct what will cost you blade height and work) PLUS you will experiene pieces of the cutting edge chipping out (in particular on coarse stones) - these will get caught in the mud and cause deep scratches in the cladding generating further work.
- IF you do get to the point that you discover low spots during bevel finishing (they will become visible latest on 400 grit stone) than you have 2 options:
- If you do not have dips in the cutting edge yet (at those low spots), than keep working the bevel, but avoid material removal at the low spots. Continue at the coarse stone until the rest of the blade will match the low spots.
- If you (like what happened to me above) already have 'dips' in the edge profile appearing, than take the knife at 90 degrees relative to the stone, grind the edge until the profile is restored (thus loosing some blade height) and then continue like in the point (1)
- Do not hurry when finishing blade (or handle) as even small mistakes can set you back and you will be forced to re-do many steps and loose much more time.